The online racing simulator
Searching in Car Skins
(958 results)
JZX100Missile
ivo_drifta
S3 licensed
jpeg skin + psd file if is needed
note: the skin its already uploaded on lfs.net and its ready to install and use.
macafmac
S2 licensed
Quote from DEMON5959 :Pls make me a delivery panda skin for xrg pls

skin requests go here -> https://www.lfs.net/forum/70-Skin-requests
DEMON5959
Demo licensed
Pls make me a delivery panda skin for xrg pls
sqlyzy
Demo licensed
yo can someone make a template to make a car skin?
Juan Pablo Montoya's FW25 (williams f1 2003 for fbm)
Gustavo Alonso
Demo licensed
Hello, I hope you are well and sorry for the inconvenience, but some of you will not have the Williams fw25 skin by Juan Pablo Montoya, for fbm please
Last edited by Gustavo Alonso, .
fbm monster skin
KitteNN
S3 licensed
Quote from Mitch_68 :Just an in game shot of my FBM

hi mitch can i get that fbm monster skin pls? I fell in love with itSmile
Preview
Driv9
S3 licensed
Here is what the skin looks like btw [https://ibb.co/G5PKZB6

https://ibb.co/GFtg6rc
Driv9
S3 licensed
Skin looks good!- you know who
Antonnio Giovannazi
S3 licensed
Just made my first skin Smile

You won't able to race it on multiplayer sadly.

The skin is of a Renault R.S 16!

Enjoy it!
Reaper, Blue or black?
elpalmerian0
S3 licensed
Hey guys, I'm making this skin for the reaper x1 and I need some help cause in my version of the skin I used blue in the lower part but in the real livery it is black and I don't really know wich one I like more, wich one do you guys prefer?
(This is still WIP)

Images bellow
Made by gonzabwt
gonzabwt
S3 licensed
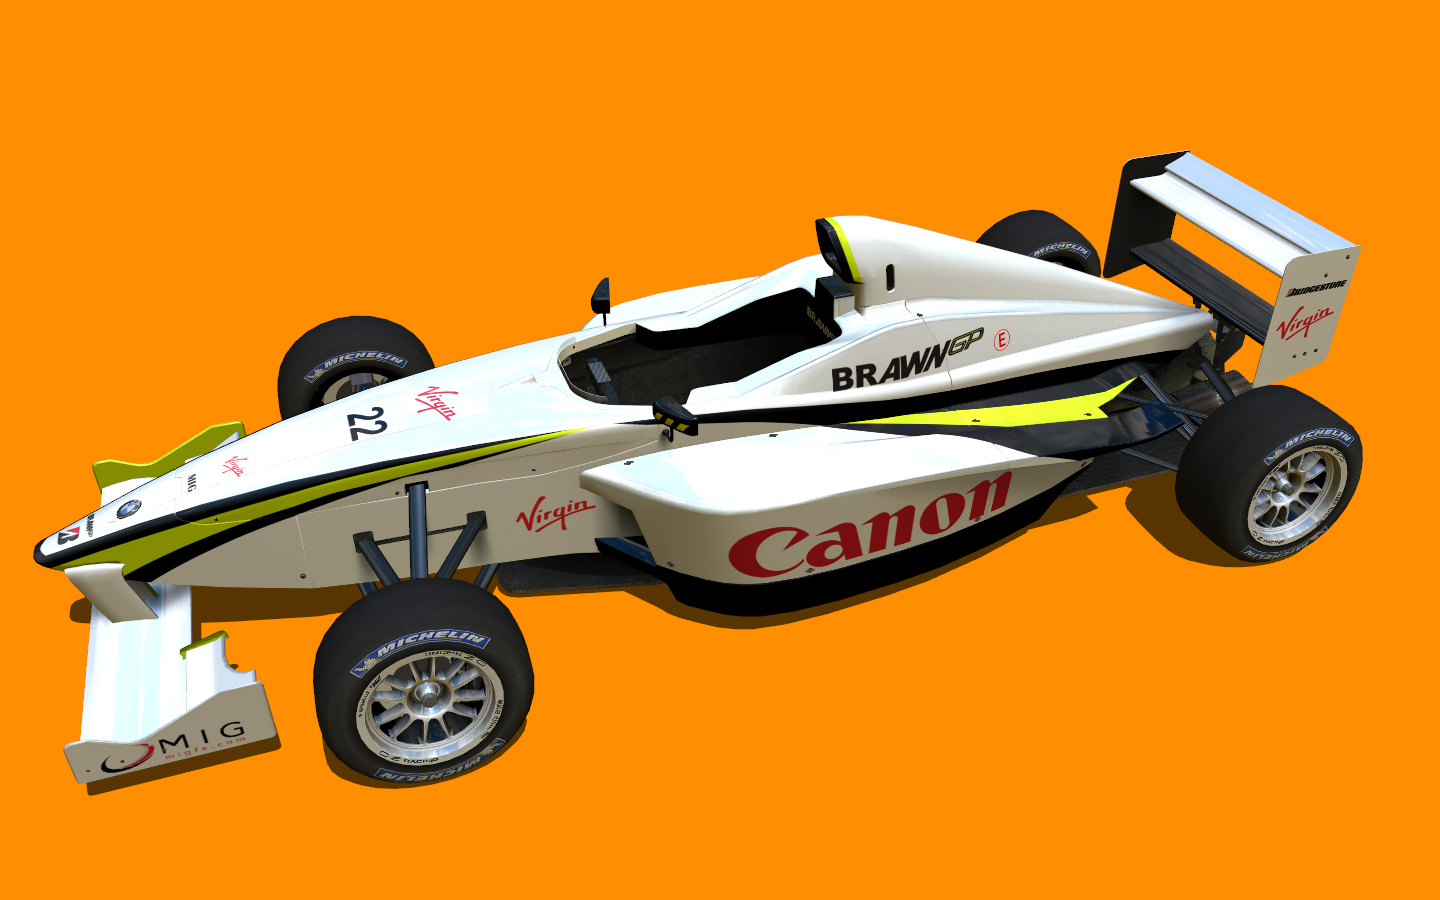
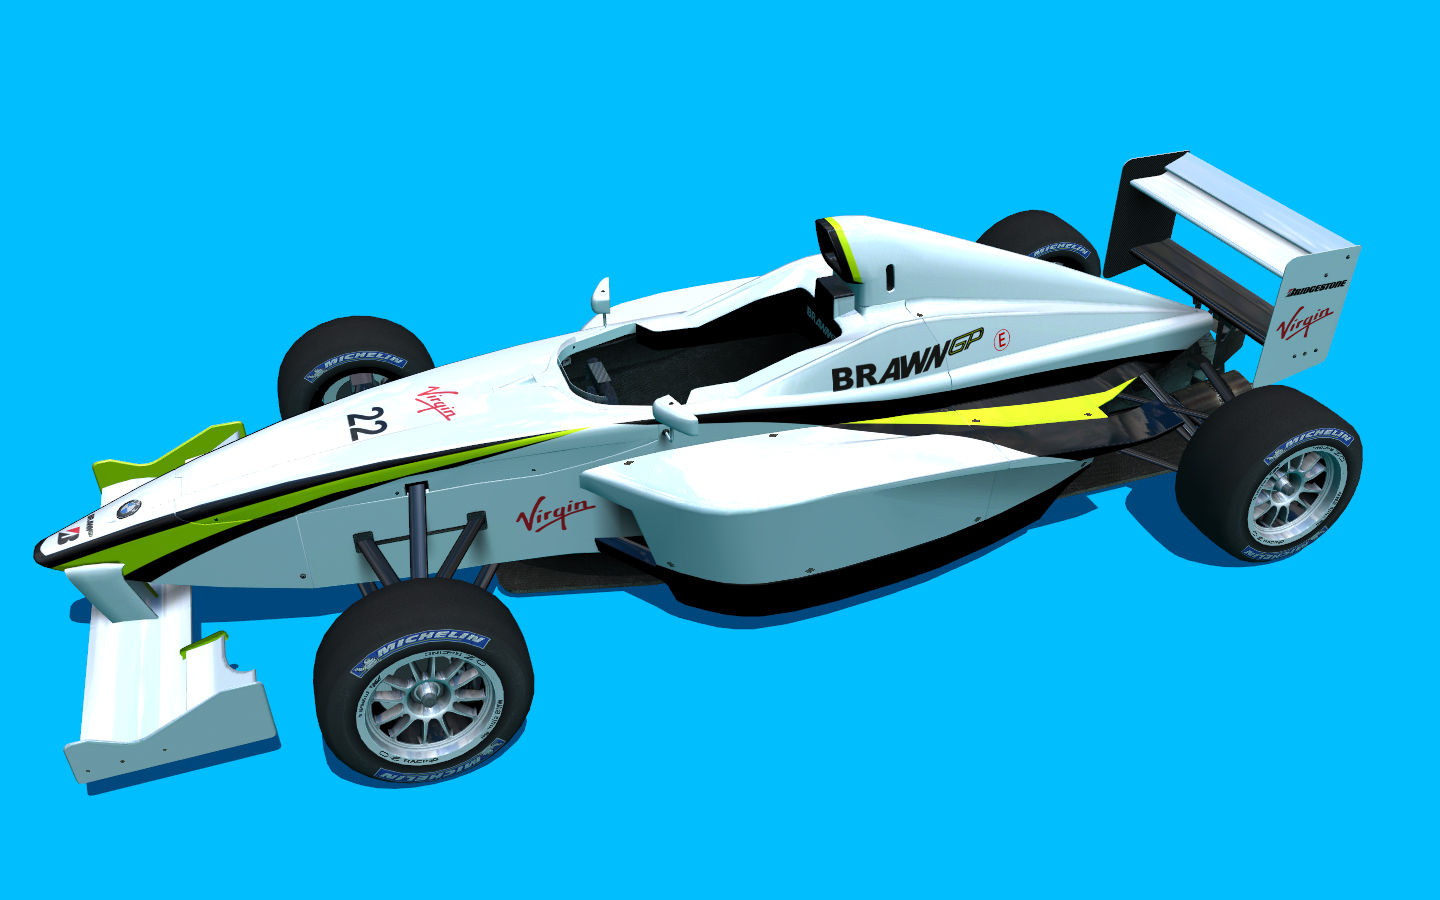
Brawn GP-Singapur Grand Prix Livery

Special Thanks to TJ

Skin Base made by Bean0

Special Thanks to KitteNN

Special Thanks to Happyd to LFS Viewer

Available to use online


Last edited by gonzabwt, .
ivo_drifta
S3 licensed
I have the decal on old XRT skin
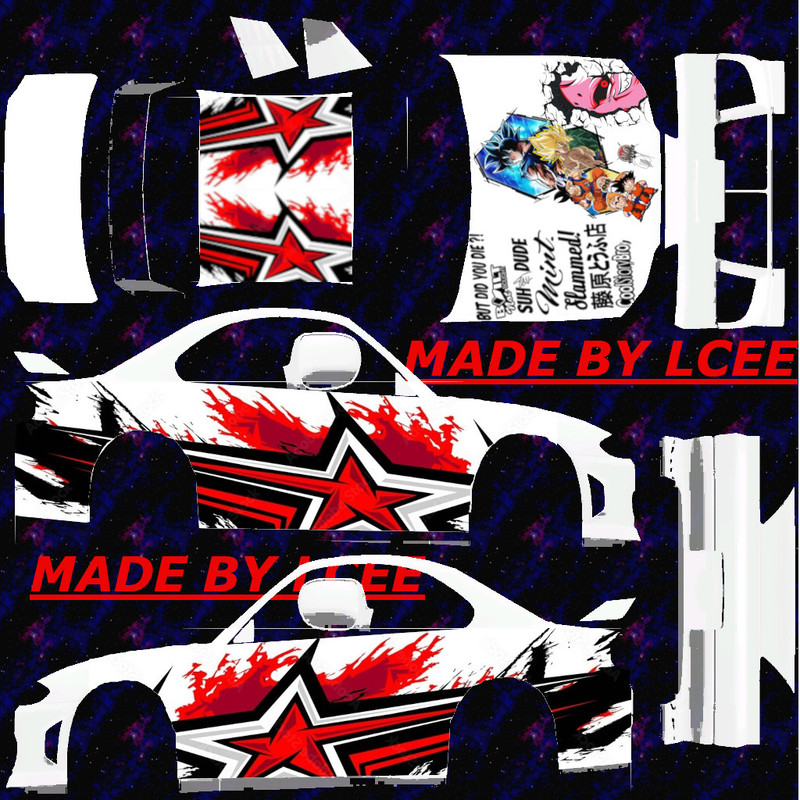
Noriyaro's iconic JZX100 Mark II drift missile
(same one that burned in flames and gone lost forever sadly)
If you like it?
BlueChewbacca
S3 licensed
Very old skin of mine, might need a remake sometime but will upload it anyway.
Inspired by the legendary Zastava "Fićo" from the 1979 movie "Nacionalna Klasa".
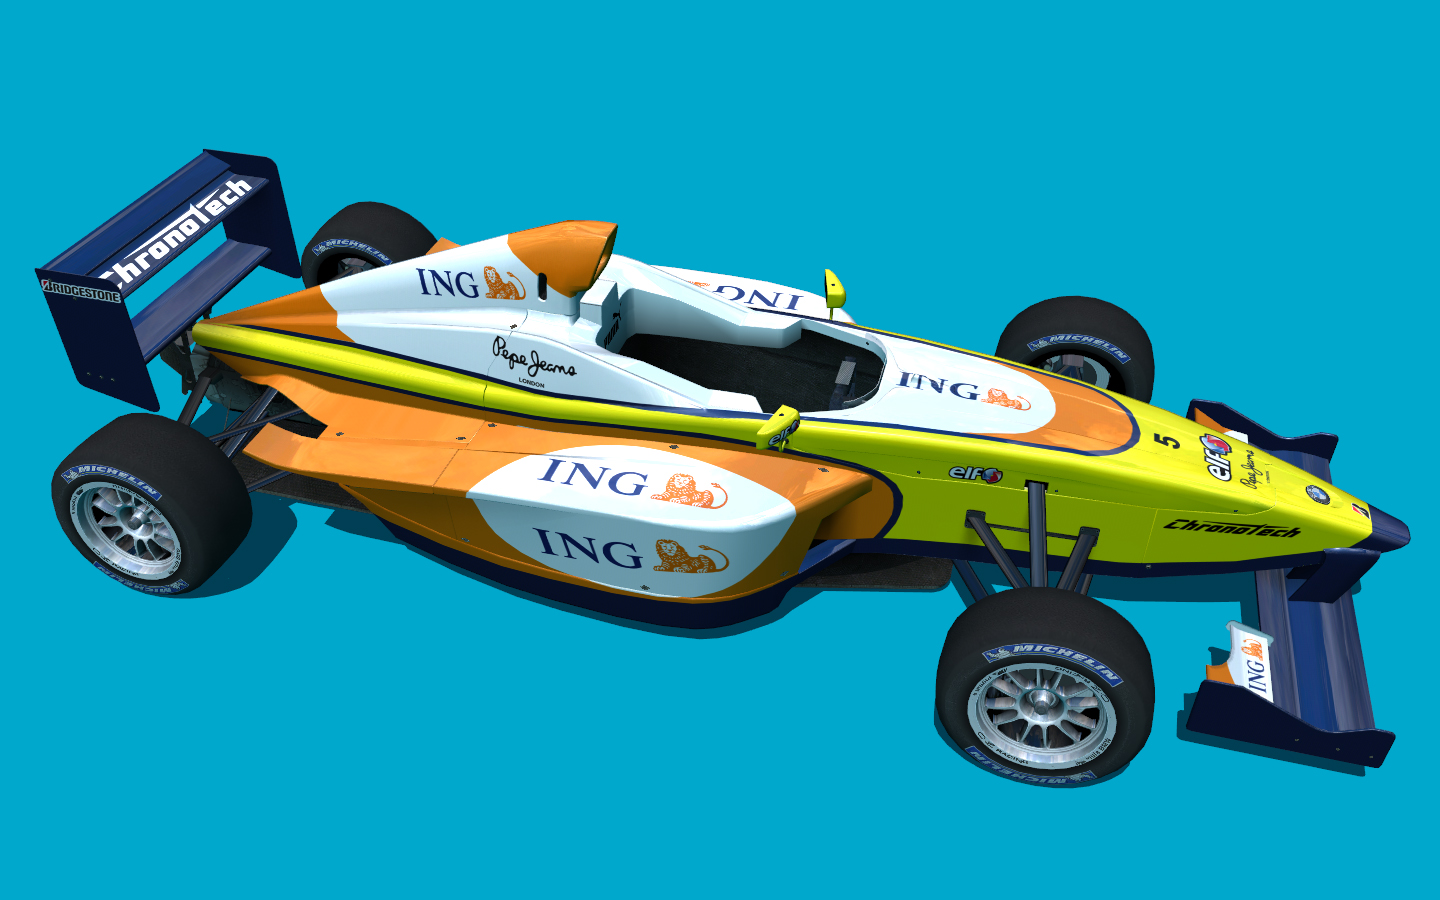
ianrte
S3 licensed
this is my new skin from now on
Made by gonzabwt
gonzabwt
S3 licensed
Renault R27

Special thanks to TJ

Special Thanks to KitteNN

Remaster of the skin made by gAg

Special Thanks to Happyd to LFS Viewer

Now available to use online


Last edited by gonzabwt, .
Saliva15 skin
Lcee
S3 licensed
Hello,

Please delete if it's not allowed here; but here's a free skin to use for the Saliva15.
It's the first skin I made so please don't go hard on me.

Rich-add
S3 licensed
Quote from Sandorszabo :I made a skin for XRG about Satsuma GT in the game called My Summer Car.
Link:https://www.mediafire.com/view/iyfcda84qkhuoxx/XRG_SATSUMAGT.jpg/file

At the moment I don't think the skin is done, and sorry for I got no pictures
(First skin uploaded, who cares tho)

Since the user in question is currently a demo licensed and doesn't have skin upload slots, I have uploaded the skin for him with permission. Thumbs up Nod
Griffin20069
S3 licensed
hey its me i love this skin
Bosch skin
bartek21pl
Demo licensed
Bosch skin
XRG Satsuma GT skin replica
Sandorszabo
Demo licensed
I made a skin for XRG about Satsuma GT from the game called My Summer Car.
Link:https://www.mediafire.com/view/iyfcda84qkhuoxx/XRG_SATSUMAGT.jpg/file

At the moment I don't know is the skin is done, and sorry for I got no pictures
(First skin uploaded, who cares tho)
Last edited by Sandorszabo, .
XFG_MENARINI
guta_111
Demo licensed
martini car skin 2010 (REMAKED)
nikopdr
S3 licensed
5 euro per skin
neuroticat
S3 licensed
Quote from ClasK_03 :Seems like someone has embraced this method, nice to see! This text gives me so AI vibes though and I found one issue so far, you should definetly not use 1024x1024 as your texture size. LFS has locally supported 4096x4096 as texture size for many years now and you should definetly use that. Looks much nicer. LFSW still only supports 2048x2048. I still havn't tried the decal placing described above, but just reading it, it still seems easier to do that in photoshop, I'll give it a try though.

Regarding your AI vibes... no... i'm just dumb and forgot the images

And regarding 1024x1024... yes you're right, i meant it as a follow up tutorial so whomever is following it up could leave it as default and not have too many worries. But working in 2048 or 4096 is objectively better. BTW you can just write *4 next to the number and blender calculates it automatically.

Quote from ClasK_03 :While we are on the topic of sharing tips on how to skin using this method I'm going to share how to make the skin symmetrical and mirror it along the center of the car.

That seems very useful, it gives me some ideas for future skins.

While i'm at it, another thing you can do in Blender is baking the Ambient Occlusion. Could prove useful if you're making the interior of some mods.


This means, connect some stuff. And you have a procedural dirt skin.

Last edited by neuroticat, .
ClasK_03
S3 licensed
Seems like someone has embraced this method, nice to see! This text gives me so AI vibes though and I found one issue so far, you should definetly not use 1024x1024 as your texture size. LFS has locally supported 4096x4096 as texture size for many years now and you should definetly use that. Looks much nicer. LFSW still only supports 2048x2048. I still havn't tried the decal placing described above, but just reading it, it still seems easier to do that in photoshop, I'll give it a try though.

While we are on the topic of sharing tips on how to skin using this method I'm going to share how to make the skin symmetrical and mirror it along the center of the car.

Add a node setup like this between your texture coordinate and mapping node:

FOR OBJECT COORDINATE (Recommended):


For generated coordinates:


This will make all textures that has this mapping mirrored along the center.
Last edited by ClasK_03, .
Advanced skin making with Blender
neuroticat
S3 licensed
I decided to release the secret of the milanesa, a little how-to on some results you can accomplish with Blender. You're gonna need these models:
https://www.lfs.net/forum/thread/95307-NEW-Blend-and-OBJ-Files-for-All-LFS-Cars-Updated-v1-2%21
Also there's a video and a post that goes onto some of the stuff i'm doing, credit where credit is due:
https://www.youtube.com/watch?v=HkRlqbFo0SA
https://www.lfs.net/forum/thread/95303-Tutorial%3A-Procedural-skins-using-Blender%21

First and foremost, Blender has a feature which lets you bake textures. Meaning you can make a procedural skin and bake it into an image. This allows you to have a seamless, form fitting texture that you can apply to a multitude of cars.
To make it you will need to have enabled Cycles as a Render Engine (In Render Properties, the camera icon in the lateral bar) Then the Bake section, put Bake Type in Diffuse and check "Color". You don't need Indirect and Direct, but if you want to you can enable them and put an HDRI image for light. This will give you a texture which has shadows and ambient colors, which would look good if the same enviroment aligns in LFS. It wont.

Now, let's say you want for example, a camo skin. Go to the Shader Editor (or Shading tab at the upper bar) and add a Noise Texture, a ColorRamp and connect this to the base color. Change the Noise Texture from Linear to Constant and move the arrow to the middle, if you select the arrow and click it's color at the bottom it allows you to change it. It does look wonky though, to fix it add a Texture Coordinate and a Mapping (in that order) or press Ctrl+T if you have Node Wrangler enabled. Play with the values until it looks good, i recommend having a reference picture to compare it (i didn't and it looks like this). If you want to add more spots, select the previous concoction and duplicate it. Then add a Mix Node, change Float to Color and connect both lines into it, and it into Base color. Shift+A allows you to speed up this whole process.
Few things to note, you CAN change the color in the ColorRamp to be transparent. Then connect the Alpha into the Factor and Mix it that way. Or change from Mix to Multiply, or Overlay, or anything you want. There's multiple ways to reach the same goal, chose the one you prefer.

Also Adding a Snap Node with a value connected to increment makes the camo look digital. Connect it between the Mapping and the Noise Texture.

Great! Let's bake it. Add a Image Node in the Shader Editor and Click New, make your prefered options (1024x1024 should work fine) and keeping the Image Node selected AND the mesh selected. Click the Bake button in Render Properties. Now you should see your texture in Image Editor tab, click the 3 horizontal lines>Image>Save As and you have your texture.

Moving on into a more versatile example. With a Gradient Texture connected the same way (Texture Coordinate>Mapping>Gradient Texture>ColorRamp>Base Color) add a color stop in the ColorRamp, change its color to transparent and move the Arrows until it looks like a stripe. Connect the Alpha wire from the ColorRamp into the Alpha from the PrincipledBSDF and bake it. This image you can Paste as a layer in any image editor and you will have an instant Stripe in any skin.


With the knowledge from the previous example i made this rainbow stripe, placing it is tricky but with trial and error it's feasible. If you want it to only appear in certain panels of the car, i can show you another trick. Go to Edit Mode (Press Tab) deselect everything (Press A twice) and with the mouse over the panels you don't want, press L. Then go to Mesh>Separate>Selection (or press P). You can bake this meshes separately now. Or join them again with Ctrl+J.

Some few uses for the Gradient Texture, change Linear to Radial and you can achieve this. Or change it into Quadratic to achieve this, the limit really is your imagination.

Moving on into the next feature, you've baked your image and now you want it to have stickers. Fair enough, select the image and connect that into the Base Color. Then go to the Texture Paint tab, click New then click Open in the Texture Properties tab in the lateral bar (checkered square). Search for your PNG and after you select it, disable Interpolation. You can paint the sticker now, for better placing go to Active Tool (the first tab in the lateral bar) and change the Mapping to Stencil. This enables you to move the PNG with your mouse, using right click, Ctrl+right click and Shift+ right click. Change the Falloff to Constant for a sharper edge.

Placing your stickers this way allows you to control the way it looks, in the sense that it changes with the perspective you're placing it with. Putting the camera close and it will look very deformed, put it into Orthographic (numpad 5) and it will look mostly perfect. If the Stencil looks somewhat weird, click Reset Transform and Image Aspect and it should be spot on.


This is the end of my ramblings concerning some of the uses you can bring with this tool. If you're sane after subjecting your eyes to my horrid creations, leave a comment Smile

*Just realized i made a blunder uploading the images Face -> palm, welp here it goes again.
Last edited by neuroticat, .
FGED GREDG RDFGDR GSFDG