Script written by: Yisc[NL]
Use script with LFS Lapper version: 7.0.4.9 or above
Most recent script version: 2.01
Most recent version released at: 31-10-2017
Command to start the module: !ss , !set_schedule
=======================
Starting module for the first time and creating general settings:
Module 'schedule_set.lpr' can be used by server owners/league organisers to enter their races into a schedule and then let Lapper take care of the rest.
When the module is started for the first times, a warning is given on both the Lapper console as on screen within LFS, that some basic settings need to be made first.


Along with the warnings, the 'Configure general schedule settings' window will be brought up and will look like this:
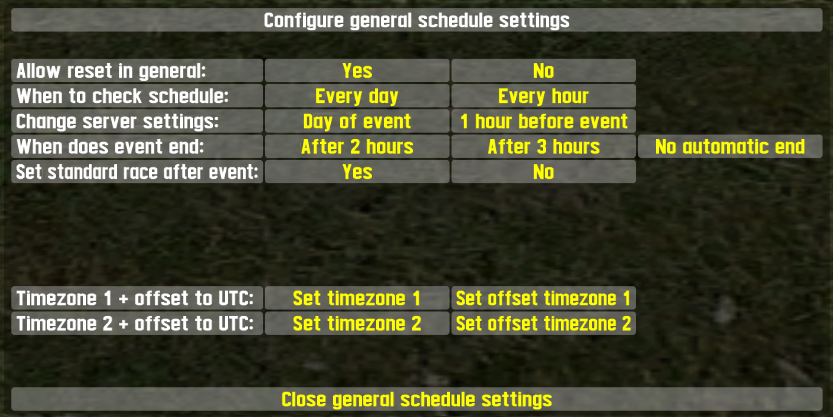
We take a closer look at the choices that can be made in this window:
'Allow reset in general' can be set to YES or NO and will decide wether players are allowed to reset their car when the server isn't running in 'event-mode'.
'When to check schedule' can be set to "Every day" or "Every hour" and will tell LFS Lapper when to check the inserted schedule and make any changes if they are required.
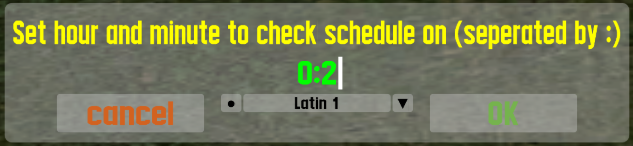
In case it's set to "Every day" an extra button will appear with the text 'Set time'.
Once that button is clicked a value can be added to set the hour and minute to do the actual checking.
Those values needs to be seperated by a :, and no leading zeros have be used.
So if you would like to check settings every day at 00:02, you set the value to 0:2 and click the OK button to save the value.
'Change server settings' will decide when LFS Lapper will go into 'event-mode'.
The choices are 'Day of event' or '1 hour before event'
Of course you will need to think about this choice in relation to the choice you made when setting 'When to check schedule'.
'When does event end' will decide when LFS Lapper will go back to 'normal-mode' after and event has taken place.
You can choose to end an event 2 hours after the start, 3 hours after the start, or not to end the event at all.
If you set this value to either 2 or 3 hours, it will mean that regardless the setting you made in the 'When to check schedule' box, no checking of schedule will be done as long as the event is running.
'Set standard race after event' can be set to either YES or NO.
When set to YES, you will get an extra set of options, that will be loaded after the event has ended.
Again, this option will only work if you set to end the event after 2 or 3 hours.
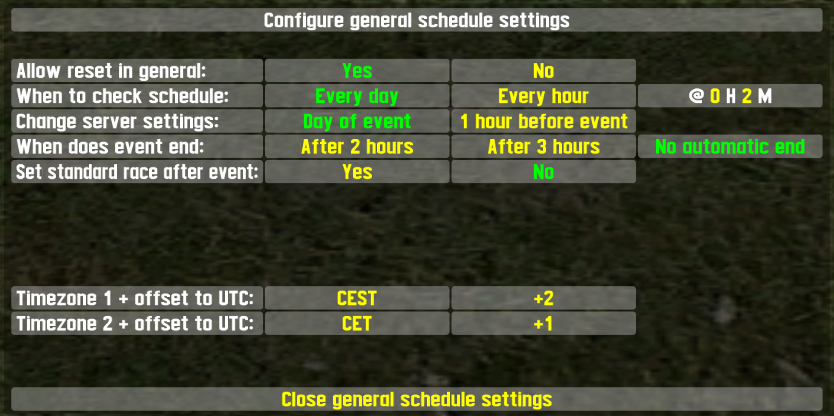
'Timezone 1 + offset to UTC' can be used to specify your local timezone and its offset to UTC.
Since I am based in Europa, I set it to 'CEST' and the offset to +2
'Timezone 2 + offset to UTC' can be used to specify a second local timezone and its offset to UTC.
Since I am based in Europa, I set it to 'CET' and the offset to +1
Once you are done making all these general settings (every setting is stored into the LFS Lapper database immediately), you can click the 'Close general schedule settings' button.
Once you did that, the actual module to enter your races into, will be opened and a message will be shown that Lapper needs a restart to activate the general settings.
To restart Lapper, use command: !reload

=======================
Starting to fill the schedule:
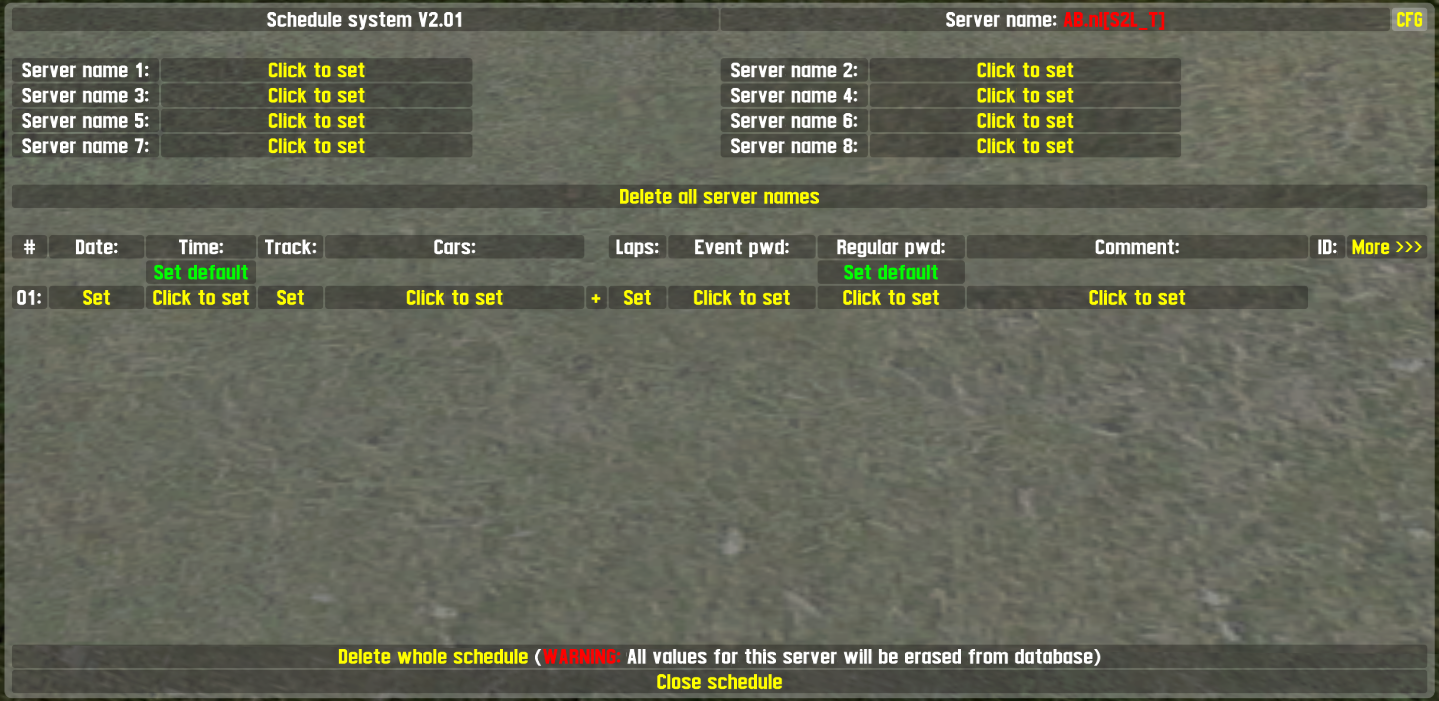
The module can store and handle schedules for a maximum of 8 servers.
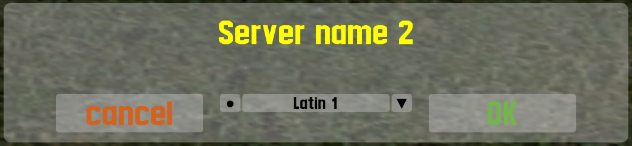
You can set the name of a server by clicking at one of the 'Click to set' buttons that are behind 'Server name x', but if you want to use the name of the server you are currently on, you can also click the 'Server name 1' button using your LEFT mouse button, to copy the name of the server you are currently on, to the Server name 1 field.
If you did do the copy action the text 'Server name 1' will turn green, to indicate that the schedule (although no settings have been made yet) have been loaded.
If you set the name of a server, but that one isn't currently loaded, the text 'Server name X' will be in yellow.
There are two ways to delete the name of a server:

It's important to know that deleting a server name, DOESN'T delete the corresponding schedule for that server name.
If multiple server names are set and you want to load the schedule of a diffent server name then the one that's currently loaded (the one with the green text saying 'Server name X'), then click on the server name you want to load, using your LEFT mouse button.
Once you did that, 'Server name X' will be shown with green text and the previous one will get a yellow text.
There's also a message displayed, to indicate that the active server name has been changed and the schedule of that server name has been loaded:

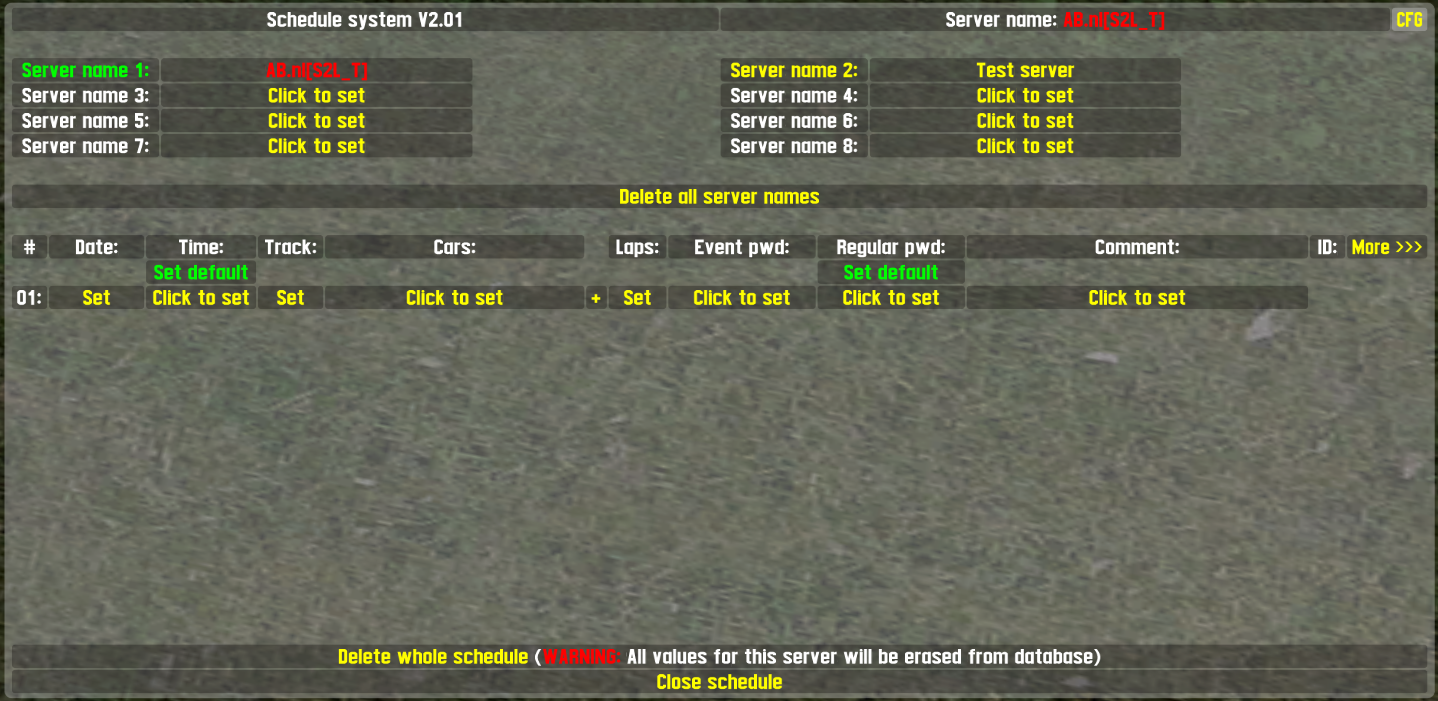
Now that the name(s) of the server(s) is/are set, it's time to add an actual schedule for that server name.
To do so, we will start by setting the first race date by clicking the 'Set' button in the Date column.
That will take you to an input field, which also tells you in which format the date needs to be added:
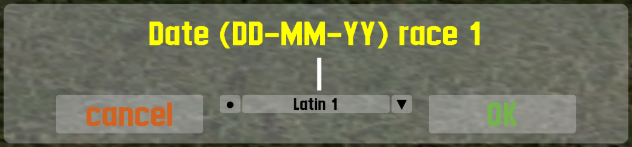
As soon as the date has been entered and is accepted by the module (every field has data validation, to prevent people entering data in the wrong format or illegal values in the wrong places (like text in a number field or vice versa)) a second row will appear and the number of the first row will be displayed with red text, to indicate that vital information is missing at the moment:
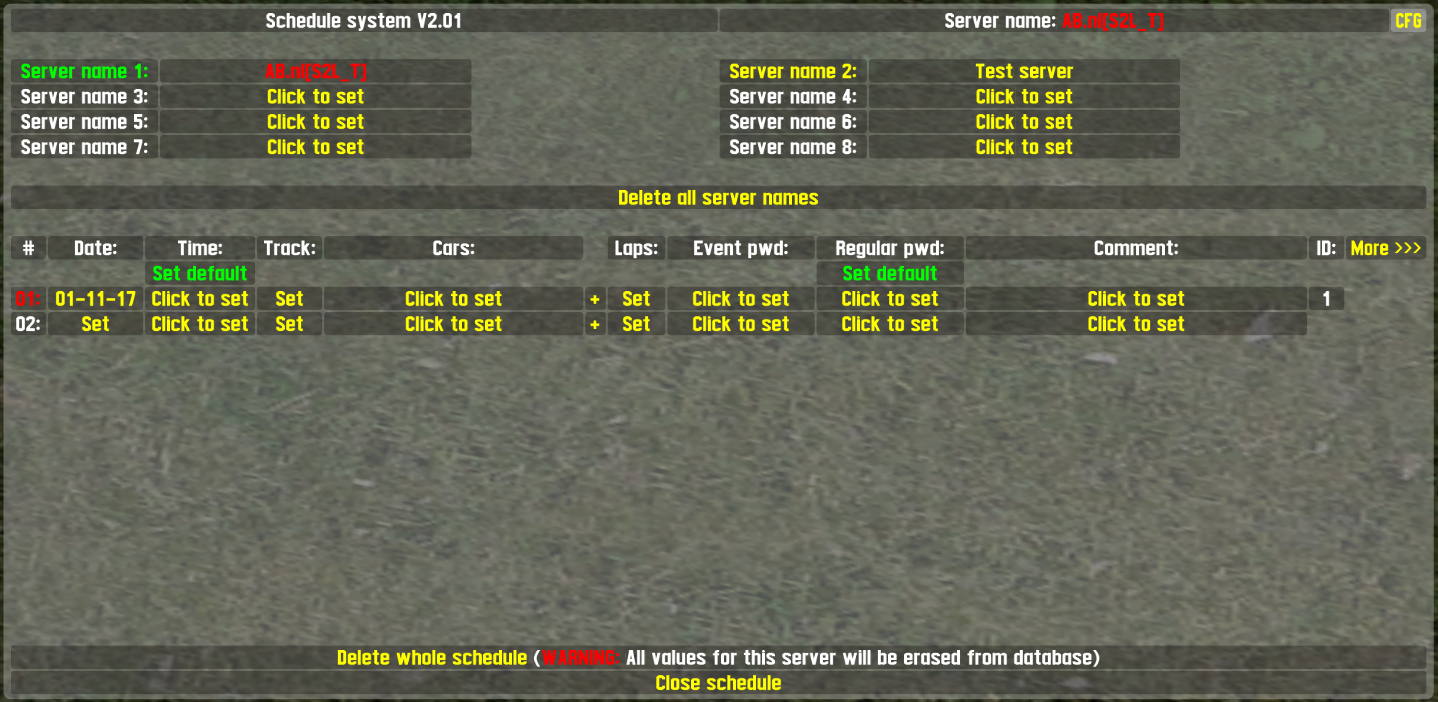
Vital information is "date, time, track, car(s), laps" and once those 5 fields are filled, the nummer will be displayed with white text again.
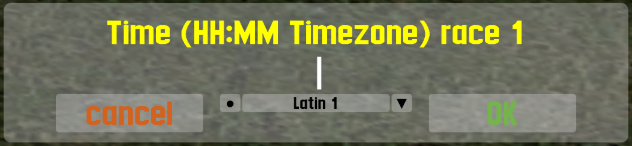
Next step is to set a time when the race will take place.
To do so, we click the 'Click to set' button in row 01 and are then presented with another input field, which again tells us what format is required:
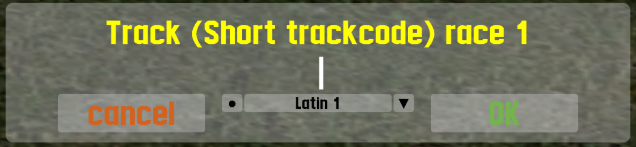
Next up is the track the race will be held on.
We click the 'Set' button in row 01 and are presented with another input field, which tells us that the short trackcode needs to be entered:
Next field is the car (or cars) the race will be held with.
There are two options to set the car(s):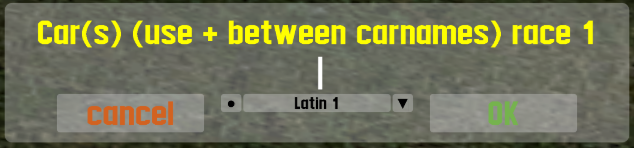
When you have chosen to type the carname(s), simply type name and use the + sign if you want to set multiple cars.
Example with only using XFG, you just type: XFG
Then press OK to save the value.
Example with using UF1 and XFG, you just type: UF1+XFG
Then press OK to save the value.
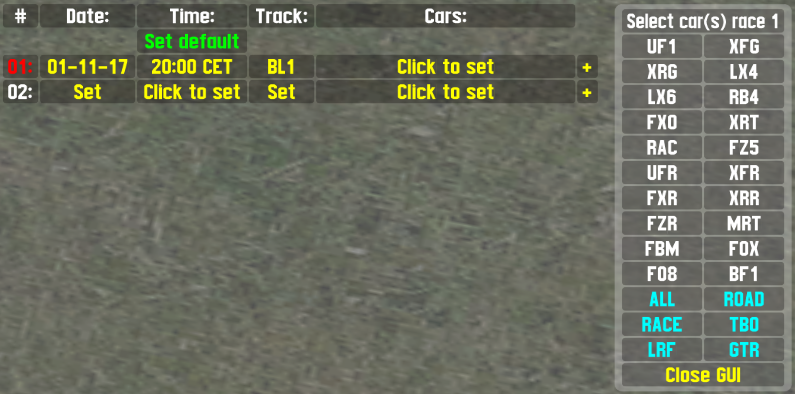
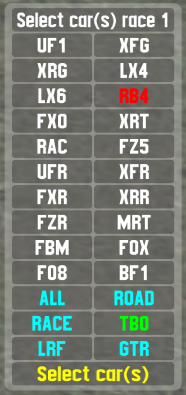
When you have chosen to use the car selection GUI, just click the name of the car(s) using your LEFT mouse button (name of the car will change to green, to indicate it has been selected) and once you selected all the cars you want, click the 'Select car(s)' button at the bottom of the car selection GUI.
To de-select a car, just click the name for a second time with your LEFT mouse button and the name will change to white again, to indicate it is no longer selected.
The car selection GUI also shows you some groups of cars (the values displayed in cyan) that can be chosen.
To select a group, click its name using your LEFT mouse button (name will turn green) and de-select it by clicking it again using your LEFT mouse button (name will turn cyan again).
If you want to know which cars belong to that groupname, click the name using your RIGHT mouse button and then information about that group will be displayed as a chatmessage:

The last special function of the car selection GUI is the option of using one or more groups, but to exclude certain cars from it.
Let's say we want to race with group "TBO" but want to exclude the RB4.
First with click 'TBO' using our LEFT mouse button to select the group.
Then we click 'RB4' using our RIGHT mouse button (name will go red) to exclude that car from the selected group:
When excluding a car (or multiple cars) an INFO message is shown, that excluding a car is only working in combination with one or more groups (and of course if that car belongs to the selected group(s)):

The last piece of vital information that needs to be added now, is the number of laps the race will be.
To do so we click the 'Set' button on row 01 and are again presented with an input field:
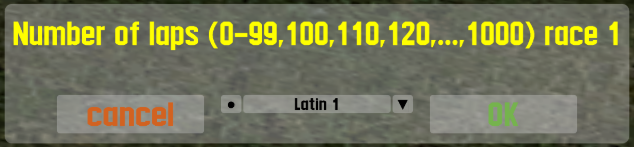
Valid numbers are: 1 up to and including 100
Above 100 the steps are always in 10 laps, so 110, 120, 130, etc. to a maximum of 1000 laps.
With the last piece of vital information in place, the number of the race will turn white again, to indicate that all needed information has been entered:

[More information will be added soon]
Use script with LFS Lapper version: 7.0.4.9 or above
Most recent script version: 2.01
Most recent version released at: 31-10-2017
Command to start the module: !ss , !set_schedule
=======================
Starting module for the first time and creating general settings:
Module 'schedule_set.lpr' can be used by server owners/league organisers to enter their races into a schedule and then let Lapper take care of the rest.
When the module is started for the first times, a warning is given on both the Lapper console as on screen within LFS, that some basic settings need to be made first.
Along with the warnings, the 'Configure general schedule settings' window will be brought up and will look like this:
We take a closer look at the choices that can be made in this window:
'Allow reset in general' can be set to YES or NO and will decide wether players are allowed to reset their car when the server isn't running in 'event-mode'.
'When to check schedule' can be set to "Every day" or "Every hour" and will tell LFS Lapper when to check the inserted schedule and make any changes if they are required.
In case it's set to "Every day" an extra button will appear with the text 'Set time'.
Once that button is clicked a value can be added to set the hour and minute to do the actual checking.
Those values needs to be seperated by a :, and no leading zeros have be used.
So if you would like to check settings every day at 00:02, you set the value to 0:2 and click the OK button to save the value.
'Change server settings' will decide when LFS Lapper will go into 'event-mode'.
The choices are 'Day of event' or '1 hour before event'
Of course you will need to think about this choice in relation to the choice you made when setting 'When to check schedule'.
'When does event end' will decide when LFS Lapper will go back to 'normal-mode' after and event has taken place.
You can choose to end an event 2 hours after the start, 3 hours after the start, or not to end the event at all.
If you set this value to either 2 or 3 hours, it will mean that regardless the setting you made in the 'When to check schedule' box, no checking of schedule will be done as long as the event is running.
'Set standard race after event' can be set to either YES or NO.
When set to YES, you will get an extra set of options, that will be loaded after the event has ended.
Again, this option will only work if you set to end the event after 2 or 3 hours.
'Timezone 1 + offset to UTC' can be used to specify your local timezone and its offset to UTC.
Since I am based in Europa, I set it to 'CEST' and the offset to +2
'Timezone 2 + offset to UTC' can be used to specify a second local timezone and its offset to UTC.
Since I am based in Europa, I set it to 'CET' and the offset to +1
Once you are done making all these general settings (every setting is stored into the LFS Lapper database immediately), you can click the 'Close general schedule settings' button.
Once you did that, the actual module to enter your races into, will be opened and a message will be shown that Lapper needs a restart to activate the general settings.
To restart Lapper, use command: !reload
=======================
Starting to fill the schedule:
The module can store and handle schedules for a maximum of 8 servers.
You can set the name of a server by clicking at one of the 'Click to set' buttons that are behind 'Server name x', but if you want to use the name of the server you are currently on, you can also click the 'Server name 1' button using your LEFT mouse button, to copy the name of the server you are currently on, to the Server name 1 field.
If you did do the copy action the text 'Server name 1' will turn green, to indicate that the schedule (although no settings have been made yet) have been loaded.
If you set the name of a server, but that one isn't currently loaded, the text 'Server name X' will be in yellow.
There are two ways to delete the name of a server:
- Click the name of the server, don't enter any text and press the OK button
- Click 'Server name X' using your RIGHT mouse button
It's important to know that deleting a server name, DOESN'T delete the corresponding schedule for that server name.
If multiple server names are set and you want to load the schedule of a diffent server name then the one that's currently loaded (the one with the green text saying 'Server name X'), then click on the server name you want to load, using your LEFT mouse button.
Once you did that, 'Server name X' will be shown with green text and the previous one will get a yellow text.
There's also a message displayed, to indicate that the active server name has been changed and the schedule of that server name has been loaded:
Now that the name(s) of the server(s) is/are set, it's time to add an actual schedule for that server name.
To do so, we will start by setting the first race date by clicking the 'Set' button in the Date column.
That will take you to an input field, which also tells you in which format the date needs to be added:
As soon as the date has been entered and is accepted by the module (every field has data validation, to prevent people entering data in the wrong format or illegal values in the wrong places (like text in a number field or vice versa)) a second row will appear and the number of the first row will be displayed with red text, to indicate that vital information is missing at the moment:
Vital information is "date, time, track, car(s), laps" and once those 5 fields are filled, the nummer will be displayed with white text again.
Next step is to set a time when the race will take place.
To do so, we click the 'Click to set' button in row 01 and are then presented with another input field, which again tells us what format is required:
Next up is the track the race will be held on.
We click the 'Set' button in row 01 and are presented with another input field, which tells us that the short trackcode needs to be entered:
Next field is the car (or cars) the race will be held with.
There are two options to set the car(s):
- Click the 'Click to set' button and enter the carname(s)
- Click the + sign on row 01, which will open the car selection GUI
When you have chosen to type the carname(s), simply type name and use the + sign if you want to set multiple cars.
Example with only using XFG, you just type: XFG
Then press OK to save the value.
Example with using UF1 and XFG, you just type: UF1+XFG
Then press OK to save the value.
When you have chosen to use the car selection GUI, just click the name of the car(s) using your LEFT mouse button (name of the car will change to green, to indicate it has been selected) and once you selected all the cars you want, click the 'Select car(s)' button at the bottom of the car selection GUI.
To de-select a car, just click the name for a second time with your LEFT mouse button and the name will change to white again, to indicate it is no longer selected.
The car selection GUI also shows you some groups of cars (the values displayed in cyan) that can be chosen.
To select a group, click its name using your LEFT mouse button (name will turn green) and de-select it by clicking it again using your LEFT mouse button (name will turn cyan again).
If you want to know which cars belong to that groupname, click the name using your RIGHT mouse button and then information about that group will be displayed as a chatmessage:
The last special function of the car selection GUI is the option of using one or more groups, but to exclude certain cars from it.
Let's say we want to race with group "TBO" but want to exclude the RB4.
First with click 'TBO' using our LEFT mouse button to select the group.
Then we click 'RB4' using our RIGHT mouse button (name will go red) to exclude that car from the selected group:
When excluding a car (or multiple cars) an INFO message is shown, that excluding a car is only working in combination with one or more groups (and of course if that car belongs to the selected group(s)):
The last piece of vital information that needs to be added now, is the number of laps the race will be.
To do so we click the 'Set' button on row 01 and are again presented with an input field:
Valid numbers are: 1 up to and including 100
Above 100 the steps are always in 10 laps, so 110, 120, 130, etc. to a maximum of 1000 laps.
With the last piece of vital information in place, the number of the race will turn white again, to indicate that all needed information has been entered:
[More information will be added soon]